Search This Blog

Tuesday, November 28, 2017

Christmas Tree Farm


This year as our first year as a married couple, I was dying to get some great pictures for a Christmas card. Call me corny, but I just love traditional family photos. While most newly married couples use their wedding photos as a Christmas card photo, I wanted something more seasonally appropriate than our summer wedding, so I started doing some research on ideas. Turns out only 30 minutes from our home is a cut-your-own-tree farm! We have a faux tree at home, but I decided visiting the farm would make for some great-looking Christmas photos.


I was so shocked how much fun the farm was! There were miles upon miles of trees, baby lambs and sheep, tractor hayrides, and artisanal foodie finds! We drove up with my brother and sister-in-law and my little nephew.


They sold honey, jams, banana bread and salsa. We tried a little bit of everything. Their pepper jelly was unreal! Have you ever tried pepper jam? It's amazing on top of a block cream cheese with crackers....and how cute are these festive cloth toppers on each jar?


We first tried some quirky ideas for pictures....you can see how well that turned out, ha!


For future reference, scarfs are not recommended in photos where you are on someone's shoulders. Not to mention I was scared for my life climbing on his shoulders with only the ground or the trees to break my fall! After several failed attempts at getting the perfect Christmas card photo, we decided on a simple smile, side-by-side along the rows of trees. I'd say it's a pretty good start for what I hope to be our new annual tradition.


Tuesday, November 21, 2017

Sweet Potato Casserole


There are some classics that never get old, like this sweet potato casserole. I grew up in a family that made southern dishes. If you've ever had southern food, you know butter is used like a spice....the more butter added, the better the recipe. We can all agree that butter makes things taste better. This casserole is one of my favorites! It's so decadent, you'd swear you were on the dessert course. 


I've had sweet potato casserole from a few places, and it is always too sweet. It almost seemed as though the sweet potato was the secondary ingredient and sugar was the primary. This casserole is well-rounded. Without adding too much sugar and including a small amount of heavy whipping cream, this recipe is light and fluffy, has a great mouth-feel without delivering tooth-aching sweetness.

This casserole is great to serve with a holiday roast or with a classic southern meal as a side. 


Sweet Potato Casserole

Preparation:  10 min
                  Cook Time: 65 min  Total Time: 75 min                       

Ingredients
        
          5 cups mashed sweet potatoes
          1 stick unsalted butter
          1/3 cup whipped cream
          1 2/3 cup light brown sugar
          1 tbsp cinnamon
          1 bag of marshmallows

Instructions

          1) Begin by peeling the sweet potatoes and putting them in a large stock pot, covering them with water.

          2) Let the potatoes come to a rolling boil and cook until you can stick a fork all the way through. 
               About 30-45 minutes.

          3) Transfer your potatoes to a mixing bowl. Add the stick of butter and blend. Once the butter is mixed 
                in, add the sugar, cream, and cinnamon to your mixture and blend all the way through. 

          4) Pour the mixture into a casserole dish and bake at 350 degrees for 30 minutes. 

           5) After 30 minutes, dump the marshmallows evenly over the top and put it back into the oven until the 
                marshmallows are golden brown (about 3-5 minutes).


Simple Thanksgiving Tablescape


In years past, I have stuck to traditional hues for Thanksgiving. Orange, brown, and hunter green covered my table and while it looked beautiful, I have really been swooning over light and airy colors. I went grocery shopping for some Thanksgiving food staples and saw these fantastic pumpkins outside. They're such an easy DIY way to create a lovely centerpiece without much fuss.


I've never seen such pretty colors for pumpkins! Ceylon, blue-gray with tints of orange, and creamy white. Nature always surprises me with the colors it can produce. 

This year, I wanted to keep the centerpiece simple and beautiful. I usually use flowers, but this year I decided pumpkins seemed more festive...not to mention they last a lot longer, too!


We are having ten people over this year (I'm exhausted already), so I decided to create place cards for seating arrangements. Perhaps I'm still in a wedding planning frame of mind, but I think it's nice to sit different family members near others you think would have good conversation.


To keep the look from feeling too much like spring, I added warm accents like gold napkin rings and antlers. The antlers are actually ornaments from my Christmas tree. I simply tucked the tree hanger under the pumpkin to hide it. They really give the table a rustic look.


With it being our first Thanksgiving as a married couple, I wanted to integrate something with my new last name. I found these great cocktail napkins to add to our bar cart for drinks. They are so pretty I bought some for Christmas too!


How are you decorating for Thanksgiving?


Wednesday, November 15, 2017

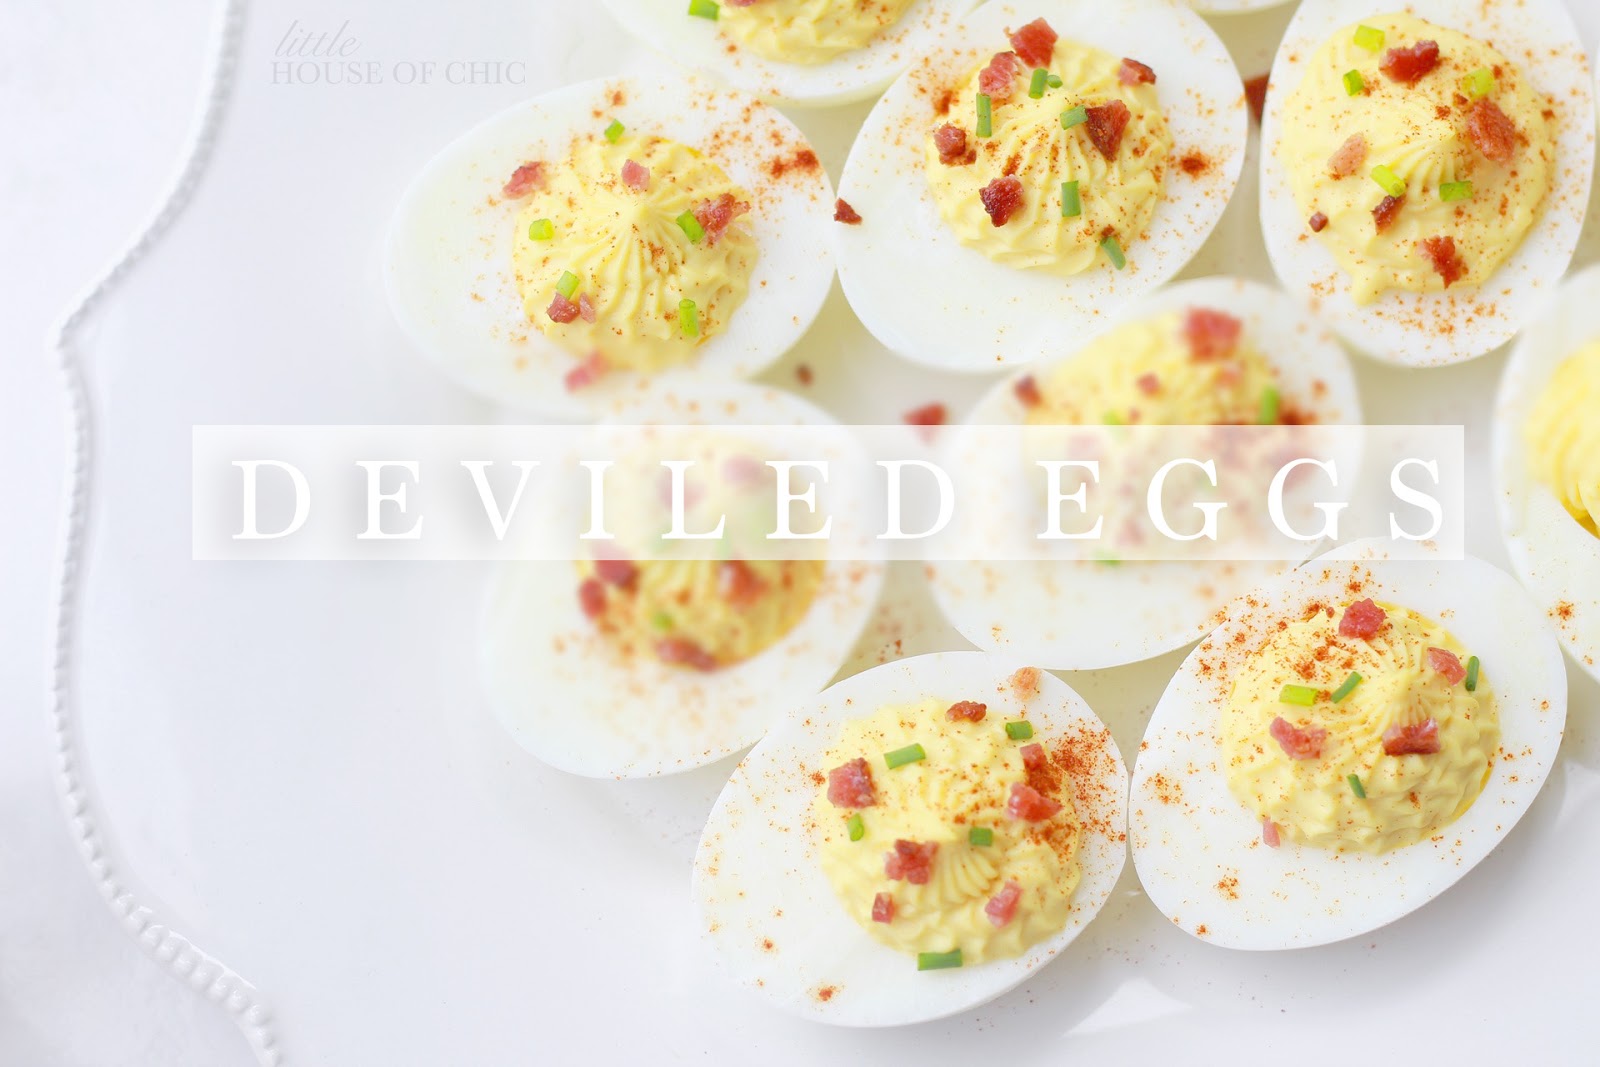
Deviled Eggs


Brunch is one of my favorite meals. More than going out for brunch, I really enjoy cooking it when we have company. I always set out a mini bloody mary bar, mimosas, and make quiche, my hash brown casserole and these deviled eggs. There's nothing fancy to these. Hey, if a recipe ain't broke, don't fix it.


A few years ago for Easter I attempted making crab-stuffed deviled eggs. They were tasty, but I found myself missing the classic. These deviled eggs are a little creamier in texture than some others I've tried, because I decided to add extra mayo to the recipe. The small amount of vinegar in this recipe gives these eggs the perfect zing.


I like to pipe my filling into my eggs because a) it makes them look nice and b) I have better control over the amount going into each egg rather than scooping heaping dollops into them. I like the perfect ratio of egg to filling: half and half. For garnish, I only used one piece of bacon that I cut into tiny little pieces. I also topped them with a small amount of chives and paprika for a pop of color and added flavor. I hope you enjoy these tasty little treats! Watch them disappear before your eyes. They're addictive.


Classic Deviled Eggs

Preparation:  20 min
                  Cook Time: 15 min  Total Time: 35 min                       

Ingredients
        
          6 large eggs
          1/4 cup + 2 tbsp mayonnaise
          1 tbsp yellow mustard
          1/2 tsp vinegar
          1/4 tsp salt
          Paprika, bacon and chives for garnish

Instructions

          1) Boil eggs as you regularly would. I find the easiest way to do this is to put the eggs in the water and 
               bring the water to a boil. Once the boil is achieved, remove the pot from the heat and cover with a lid. 
               Allow the eggs to sit in the water for 12-14 minutes after. In a bowl of ice water, transfer the eggs and 
               allow them to cool for 5 minutes. Peel and place back into the water until all are peeled. 
               Then remove them from the water and place them on a towel.

          2) Begin halving the eggs, adding the yolks to a bowl or bowl of an electric mixer. Place the whites on the 
                plate you plan to serve them on.

          3) Add mayonnaise, mustard, salt, and vinegar to the yolk mixture and blend on high for three minutes, 
                or until creamy.

          4) In a pastry bag or ziplock bag, use a large icing tip and pipe mixture into egg whites. 

           5) Top with small pieces of chive and bacon and serve immediately or refrigerate until ready to serve.


Monday, November 13, 2017

Homemade Whipped Cream


What good would the holidays be without sweets?! This is the one time of year that I am not as calorie conscience, and fully embrace the sugary delights that Christmas and Thanksgiving have to offer. 


My husband's favorite treat when it gets cold out is hot chocolate. There's nothing better than cozying up to the fire with a warm cup of cocoa topped with this homemade whipped cream (and don't forget the fuzzy socks and Christmas movies!). 


It looks so impressive to guests (or your honey) when you offer if to them, but is one of the most mindless recipes I've ever made! Simply pour the three ingredients into an electric mixer and let it do the work for you! It's ready in practically no time at all and tastes delicious.


I like scooping a dollop of this heavenly cream on a slice of pie, in my morning coffee, or on fresh fruit in the morning. It's also quite tasty as a topping for strawberry shortcake!

I'd love to hear what you plan to use this recipe with! Let me know in the comments!


Homemade Whipped Cream

Preparation:  10 min
                  Cook Time: 0 min  Total Time: 10 min                       

Ingredients
        
          1 cup heavy whipping cream
          2 tbsp sugar
          1 tsp vanilla extract
        

Instructions

          1) Put all ingredients in a bowl or kitchenaid and blend on high until the mixture becomes thick. 
               I recommend using a hand blender or kitchenaid, as your will be exhausted doing this by hand.


via GIPHY


Homemade Pie Crust


This year, I decided to step it up and make pie crust from scratch for Thanksgiving. I'll admit it...I really wanted to break in my new cookie cutters for a decorative trim. When I found out this crust can be frozen for up to two months, I decided to make it two weeks in advance of the holiday.


Each year, my family celebrated Thanksgiving at my grandparent's house. Man can that woman cook! She would slave away in the kitchen for days leading up to Thanksgiving day, and when the day came there was a spread that would put restaurants to shame. Homemade casseroles, the biggest turkey you've ever seen, and at least 6 different desserts draped her giant kitchen island as we all lined up with empty stomachs and empty plates, ready to dive in.  

{ I don't see nothin' wrong, with a little bit of chop and grindddd }


Once my grandfather passed away, my grandmother wasn't as fervent to make the holiday feast, so I decided I'd try my hand at passing on her legacy. Up to this point, I have always purchased crust from the freezer section, because it was one less task on my to-do list. 


As I began writing my list of recipes, old and new, I would be cooking this year, I thought about those homemade pie crusts she made. They were warm and buttery and oh-so crusty. It was always the highlight of the dessert course in my family. I suppose making homemade crusts has dwindled, like mincemeat pies, they're seldom seen around the holidays anymore. 


This is her recipe.


All of this time, I thought making crust would be insanely laborious and messy...wrong. It took only ten minutes to make! Now, the decorative rim is a different story.


After cutting the draped edges of the pie, I shaped the trimmings into a ball and rolled them out again,  cutting strips to form a braid. I haven't braided hair, or anything for that matter, in so long, I completely forgot how and had to YouTube it! Once I began braiding the crust, I decided I wanted to go for a different look. I removed the braids from my pie rim and rolled them back out to a blank canvas. I grabbed my new set of pie cutters and began punching out little leaves and adhered them using melted butter.

You can grab my set here:


I love the result! It is so festive and pretty! I can't wait to see it once it bakes!

What desserts are you making for your Thanksgiving dinner?


Homemade Pie Crust

Makes one crust
Preparation:  10 min
                  Cook Time: 0 min  Total Time: 10 min                       

Ingredients
        
          1 1/4 cup all-purpose flour
          1 tbsp sugar
          1 1/4 sticks unsalted butter
          3 tbsp cold water
        

Instructions

          1) Using a food processor, pour one cup of flour and half of the amount of butter and pulse until well 
                blended.

          2) Add the remaining flour and remaining butter to the food processor, and pulse until completely 
               blended. Add sugar and pulse a few more times.

          3) Transfer the mixture to a bowl or your kitchenaid and add the water. Mix with the paddle 
                attachment and blend until the dough begins to form. It should be somewhat sticky.

          4) Remove the dough from the bowl and wrap it in plastic wrap. Refrigerate for 1-2 hours before rolling 
                out. Dough can be frozen for up to 2 months and refrigerated for up to 5 days.


Sunday, November 5, 2017

Ole Miss Football + Free Popcorn Box Printable

Follow my blog with Bloglovin

It's GROVE SEASON!! Okay, okay, I realize this post is more targeted to graduates of Ole Miss or people interested in attending a game there, but I had to share. If you've never heard of Ole Miss, let me introduce you to the number-one tailgate in the country, home of William Faulkner, and a town full of amazing restaurants and charm. 

My family moved to Mississippi when I was in high school. I was sure when we moved, as soon as I graduated from high school, I was going back to Florida...until I visited my sister at The University of Mississippi. I fell in love. Girls and guys dress up in their Sunday best for game day and walk from tent to tent to enjoy libations and finger sandwiches. Walking down the Walk of Champions, the intoxicating smell of bourbon and fresh cut grass hits your nose while you drown in a sea of blue and red. 

Anyone who has been there can tell you- there is nothing like the Grove at Ole Miss on a football day.
{ image source: flikr.com - user: akmcafee9}

While not every tent is extravagant, they all have their quirks. Here in the grove, you can find chandeliers hanging from the tops of tents, topiaries in the shape of the mascot, and looks right off the runway worn by the beautiful students and graduates. Outside of the grove, the "square" houses top-ranked restaurants that have gained national recognition for their menu offerings. It's easy to get around the square as each bar, restaurant and shop are right next door to one another, making for an amazing mingling experience.

{ image source: www.thedailysouth.southernliving.com }

If you're looking for another activity that is a little more laid back, check out Taylor, MS. Only a fifteen minute drive from Oxford, this tiny town practically revolves around one spot: Taylor Grocery.   Fried catfish, okra, and a brown bag with a bottle of whatever you please to drink, Taylor Grocery is a crowd favorite. Get there early, or you can plan on waiting for up to 2 hours to snag a table at this hole-in-the-wall.


Eat or we both starve.


Taylor Grocery


William Faulkner's home and grave are located in this quaint little town. As a tradition and Ole Miss bucket list item, students imbibe on the grave sight and leave their bottle for Faulkner, as Faulkner was a known bourbon fan.


Whatever you're looking for, you can find it here in Oxford.


To download this game-day popcorn box, click the link below. 

Free Download:


Copyright @ Little House of Chic. Blog Design by KotrynaBassDesign